Audio Interfaces Explained: How to Use Audio Interfaces
Published on 28 March 2024
You’re looking to record some songs, are you? Need some help with that? Please, allow me! I’ve been recording for over twenty years now, both at home and in studios, and I’ve also spent years demoing and selling home recording equipment at guitarguitar, so I’m fully able to lend a hand through this subject!
Today, I’d like to talk about audio interfaces. If you’re not used to this world of home recording gadgets, it can all seem like double dutch: you read lists of specs that mean nothing to you and you just get overwhelmed or worse, you lose interest in the subject altogether. That’s not what we want! It’s really simpler than it seems, and if I can do it, so can you!
I’ll talk you through the subject of interfaces with the least amount of jargon possible, and I’ll explain only what you need to know in order to get going. At the end of the blog, you’ll be able to confidently understand, choose and work with an audio interface.
Are you with me? Let’s do this!
Contents
What is an Audio Interface?
Let’s get the big one out of the way first: just what is an audio interface? Put simply, an audio interface is the link between your instruments and your computer. Audio interfaces are normally small (and eventually not-so-small) boxes with inputs, outputs, buttons and control knobs on them. If you want to record music onto your computer, there are no appropriate connections on the computer itself, so you need an audio interface.
You connect your guitars, keyboards and microphones to the interface, and the interface connects to the computer via USB. This way, when you use recording software known as a DAW (Digital Audio Workstation), you’ll be able to capture whatever you play or sing through the interface to the computer.
Why is an Audio Interface Important?
Audio Interfaces are important because they not only allow you to record your own music, but they also determine the quality of those recordings. The quality of the components inside an interface, the level of control they may or may not have onboard (volume, input gain, phantom power, monitor mixing etc) can all affect the final quality of the finished song. Luckily, even today’s most reasonably priced interfaces are capable of capturing good quality sound.
Audio interfaces are really important because they allow people like you and I to make professional quality recordings at home with only a few pieces of equipment. Musicians and songwriters no longer have to pay hundreds of pounds per day to use a commercial recording studio, because the technology that you can buy from guitarguitar today is of a high enough standard for top-quality professional recordings. How amazing is that?

How Do I Use an Audio Interface?
The audio interface is the important physical part of a home studio, in addition to a computer and your instruments & mics of course. The real work is done on the DAW software, and covering that is perhaps a subject for its own blog. The interface though, is where you make all of your connections, so it goes a bit like this:
- The interface connects via USB to your computer.
- Monitor speakers or headphones (or both!) connect to the interface. You control the volume from the interface, rather than the computer.
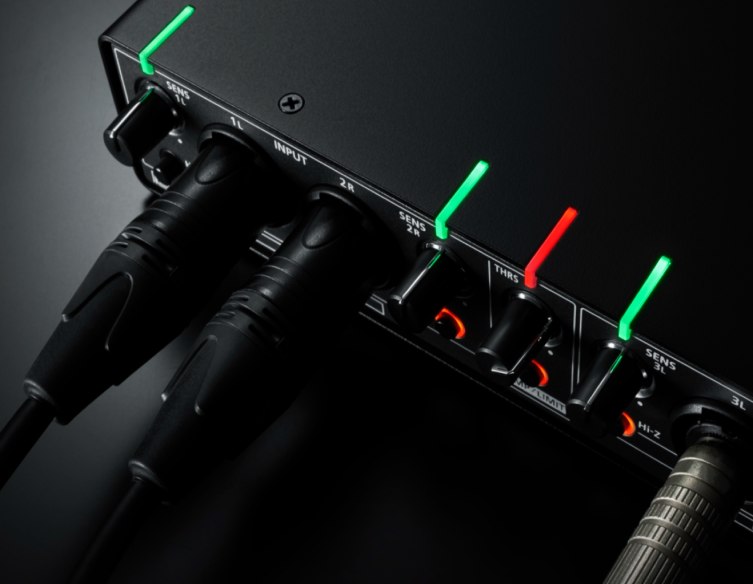
- Microphones, guitars, bass and keyboards all connect to individual inputs on the interface (though many keyboards can connect directly to the computer by USB). Instruments like guitars use the normal instrument cables that you already have. Mics use XLR cables.
- You run your DAW software and find your interface within the settings. Select it, so that the computer knows that’s what you want to use.
- ‘Arm a track’ on your DAW by hitting ‘record arm’ on an empty track of whichever DAW you’ve chosen to use.
- You should now be able to hear your guitar/voice/whatever coming through the monitors/headphones. This is what the software will pick up as audio when you hit ‘record’.
- If you want to record more than one instrument at a time, that’s possible! Your interface has to have enough inputs to accommodate all of the instruments, though. Otherwise, the common practice is to record parts one at a time.
That’s it! Everything else is a matter of learning the software, figuring out what you want to do and then doing it! The world’s your oyster!
USB Mic or Interface?
Some particular models of microphone are able to connect directly to computers via USB, instead of requiring an interface. This can be handy in some cases, since it’s a quick and simple process and you can get on with recording without hassle. That said, if I were to counsel you on this, I’d always choose to go with an audio interface and a standard condenser mic over a USB mic, in almost every situation.
Why? Well, the interface is more than just a mic connection. The interface is where you control your instrument volumes, your monitor volume and other functions: it’s like a nerve centre for your operations. Plus, the sound quality is likely to be somewhat compromised on the USB mic, as they are designed for convenience over anything else.
USB microphones have their time and their place, but I wouldn’t choose one over an interface and microphone. USB mics are good for podcasters and the like, but I’d not pick one as my first choice for music.
Choosing an Audio Interface: Options for Every Budget
Today, you do not have to spend a million bucks in order to sound like a million bucks. That said, sometimes it’s worth spending a little bit more for better gear. Cheap can be effective, but it can also just be cheap, so I aim to steer you toward the good stuff no matter your budget.
Here are some things to consider before you start out:
- Are you familiar with any DAW software? You normally get a free ‘light’ version of one or another with any interface purchase, so prior experience of a certain DAW may sway you when buying. Go with what you know!
- How many inputs do you really need? Are you mic’ing up a drum kit? If not, are you ever really going to need more than two or three inputs at any one time? You figure that out and let it dictate how you choose your interface.
- Is this a first-buy/tester purchase to see if you want to commit? Or do you want an interface that will last as your recording ambitions increase?
Answer those questions to yourself, and you’ll know how to approach this next part. I’ll look at three representative interfaces, in ascending cost. Do remember though, that there will be equivalent models in each range with more and less inputs etc, so adjust this general advice to the answers you formed for yourself in the last section.
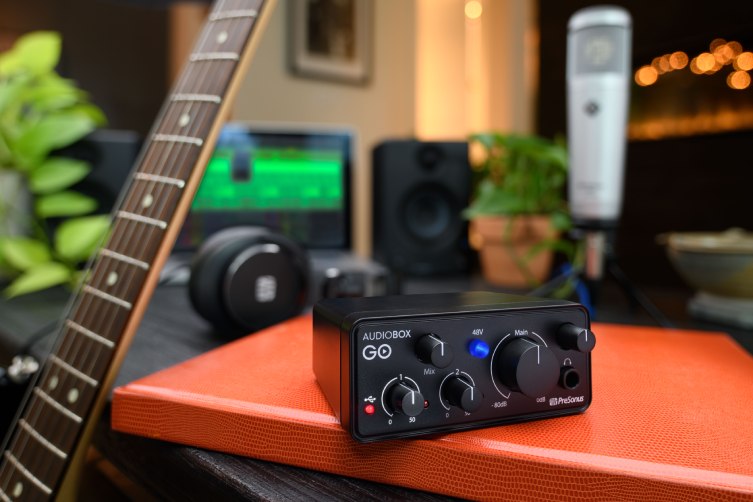
Affordable option: PreSonus Audiobox Go
For beginners and those on a budget, it’s pretty hard to see past the PreSonus Audiobox Go. This diminutive box has everything you need to get going, and brings an extremely impressive software bundle with it!
You have two inputs here - one combi input for a mic or instrument, and one ¼” input for an instrument. The Audiobox GO is powered by your computer, so there’s no worrying about an extra power supply. You even get a phantom power option onboard (learn more in our dedicated phantom power blog), so that you can use a condenser microphone. This means you can work on better sounding recordings, because the interface can handle a more sensitive mic.
On top of all of that, you get a light version of the Studio One DAW software (Studio One Prime) and a huge bundle of software synths and apps from top rate companies such as Arturia and Native Instruments. For the money, this cannot be beaten!
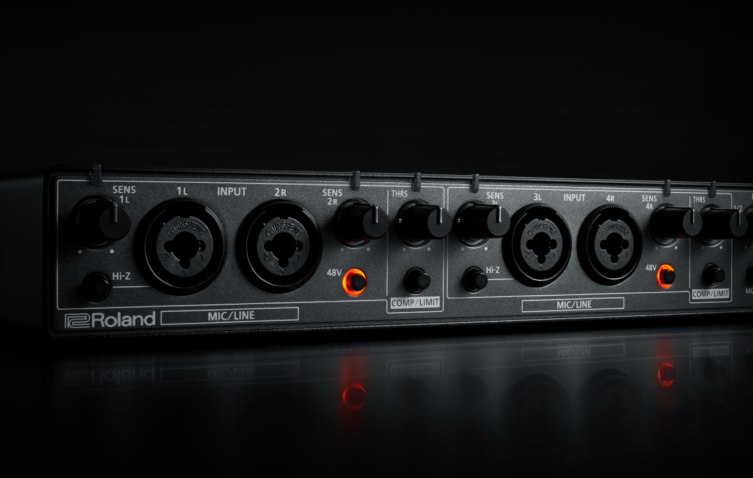
Mid-level option: Roland RUBIX44 USB
I can personally vouch for the robust, good quality of Roland interfaces, having both owned and gigged with one for many years! For this reason, I wouldn’t hesitate to recommend them to others. This interface, the Roland RUBIX 44, has a good, straightforward layout for its four inputs. On the back, there’s a pretty comprehensive collection of features, from ground lifting (get rid of that mystery hum!) to a pair of built in compressors (impressive!) and MIDI in/out, which will be essential if you’re working with classic synthesizers.
Roland also include a code to download a ‘Lite’ version of Ableton Live, one of the industry leaders in DAW software.
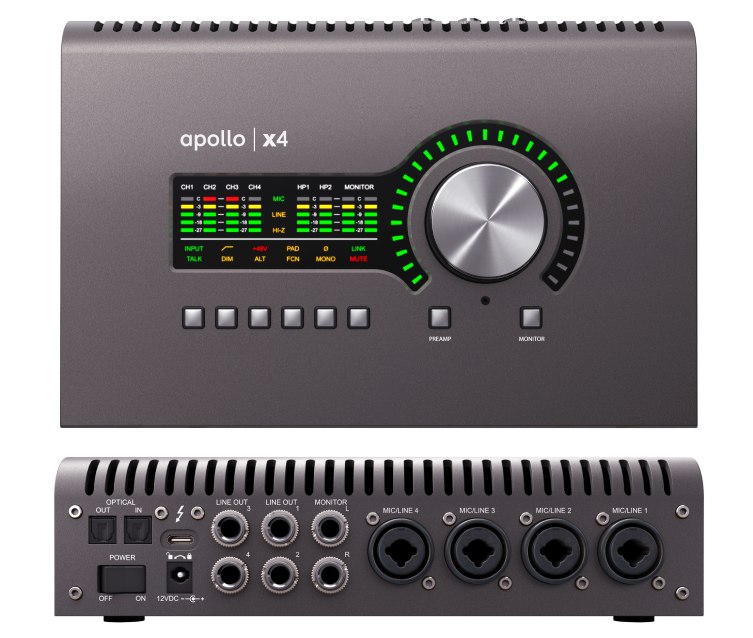
Top-price option: Universal Audio X4 Heritage Edition
If you want the very best that’s on the market, I think it’s pretty hard to beat Universal Audio. Their hardware is top-notch, their software is market-leading and their integration of those worlds is probably their greatest selling point.
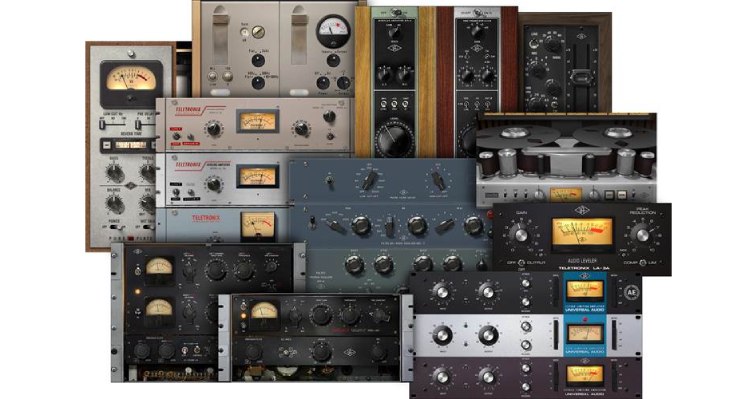
Basically, they give you some extremely good sounding, very powerful ‘plugin’ software that emulates the sound and function of famous pieces of studio gear. We’re talking about compressors, EQs and channel strips from some of the best gear in the world, and - significantly - this software is up to the task! It’s amazing stuff, and that’s quite apart from their brilliantly engineered, super-high quality physical devices.
I’ve chosen the Apollo X4, for a pretty simple reason. All UA stuff is great, and I could’ve looked at their bigger ‘rack-style’ Apollo interfaces, but the X4 is portable, convenient and, most importantly, expandable. It already has 4 inputs, which is double the amount that the Apollo Twin offers, and probably enough for 90% of your recording. But there’s more: via ADAT, you can add up to 8 more inputs, turning this from an excellent device with limited scope to a best-in-class example of efficient and inspiring design.
Follow Your Ambitions
Audio interfaces are here to help you realise your musical goals and dreams. Even if you’re slightly technophobic, these things are not overly complicated, so don’t think twice about getting started. As I’ve shown you today, you don’t need much to get going, and there’s an interface for every price point.
After a few baby steps, you’ll be able to really dive in and start producing the music that’s been waiting to come out of you for years!
Click to View our Audio Interfaces